


INSTALLATION VIDEO
PRODUCT OVERVIEW
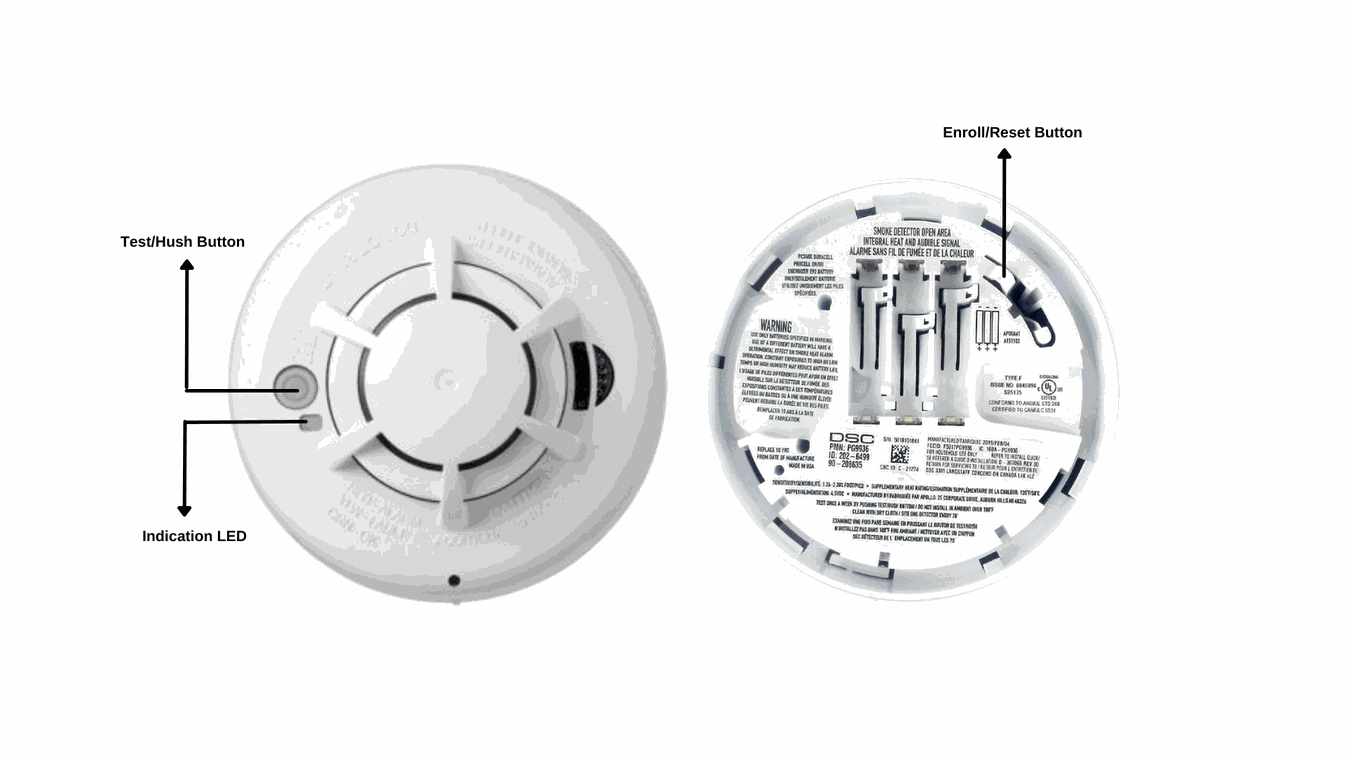
The PowerG Wireless Smoke and Heat Detector alerts you to early warning of fire.
It alerts the room's occupants by activating the built-in alarm. When smoke or temperatures above 57°C have been detected, an alarm buzzer and a flashing LED light are activated.
Simultaneously, it sends a coded signal to the control panel to sound the system siren, alerting the end user and/or central control a monitoring station to dispatch on-site assistance.
SPECIFICATIONS
Battery Life: 3 years (typical use)
Battery Type: 3 AAA batteries (included)
REQUIREMENT
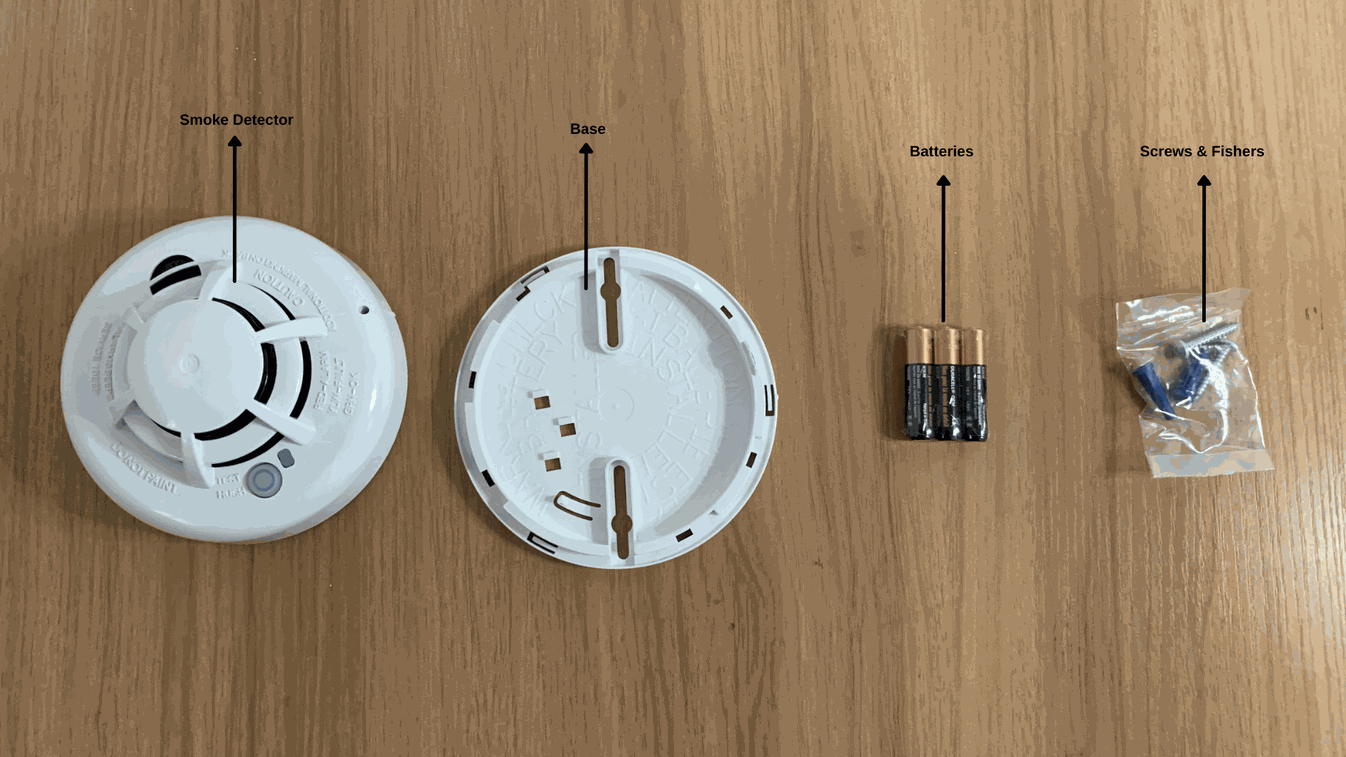
Smoke Detector
4.8mm Phillips screwdriver
Screw Gun (for mounting with screws)
UNBOXING THE SMOKE DETECTOR
Inside the package, you should find
Battery: 3 AAA batteries
PowerG Smoke Detector
Mounting Base
INSTALLATION STEPS
NB - DO NOT locate smoke detectors at the top of peaked or gabled ceilings (at the top of double volumes. Generally, avoid areas with turbulent air flow, such as near doors, fans or windows.
DO NOT locate detectors in areas of high humidity.
MOUNTING THE SMOKE DETECTOR
Ideally, the Smoke Detector is mounted at the center of the room. Also, ensure that the detector is in line with other ceiling fittings (e.g. lights, access points, etc).
Step 1
Mount the detector backplate. Install the mounting base on the ceiling using screw locations as required. Use the two screws, anchors provided and a screw gun to screw into hard walls.
Step 2
Fit the detector inside the base by aligning it over the base. The detector's alignment notch
should be slightly offset from the mounting base tamper release tab. Then turn the detector
clockwise until it clicks into place.
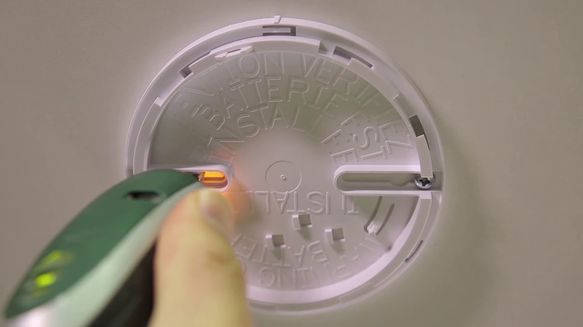
BATTERY INSTALLATION/REPLACEMENT
Step 1
Remove the detector from its mounting base by twisting the detector counterclockwise.
Step 2
Carefully remove batteries by lifting from the “+” end using a flathead screwdriver and dis-
pose of them according to local regulations.
Step 3
To ensure a proper power-down sequence, wait a minimum of 30 seconds before
installing new batteries.
Step 4
Install 3 new AAA batteries, available from a local ‘Duracell’ or ‘Energizer’ dealer in the battery compartment. Install the batteries by inserting the “-” end first, then pushing the “+”
end down.
If the batteries are incorrectly inserted, remove them carefully by lifting them out from the “+” end and correctly re-inserting them
Step 5
Re-install the detector on its mounting base by turning the detector clockwise until the mating marks align.
Step 6
After the power-up sequence, the green LED should blink once every 60 seconds to indicate normal operation.
| Views | |
|---|---|
| 868 | Total Views |
| 0 | Members Views |
| 868 | Public Views |
| Actions | |
|---|---|
| 0 | Likes |
| 0 | Dislikes |
| 0 | Comments |

To install this Web App in your iPhone/iPad press ![]() and then Add to Home Screen.
and then Add to Home Screen.
