


INSTALLATION VIDEO
PRODUCT OVERVIEW
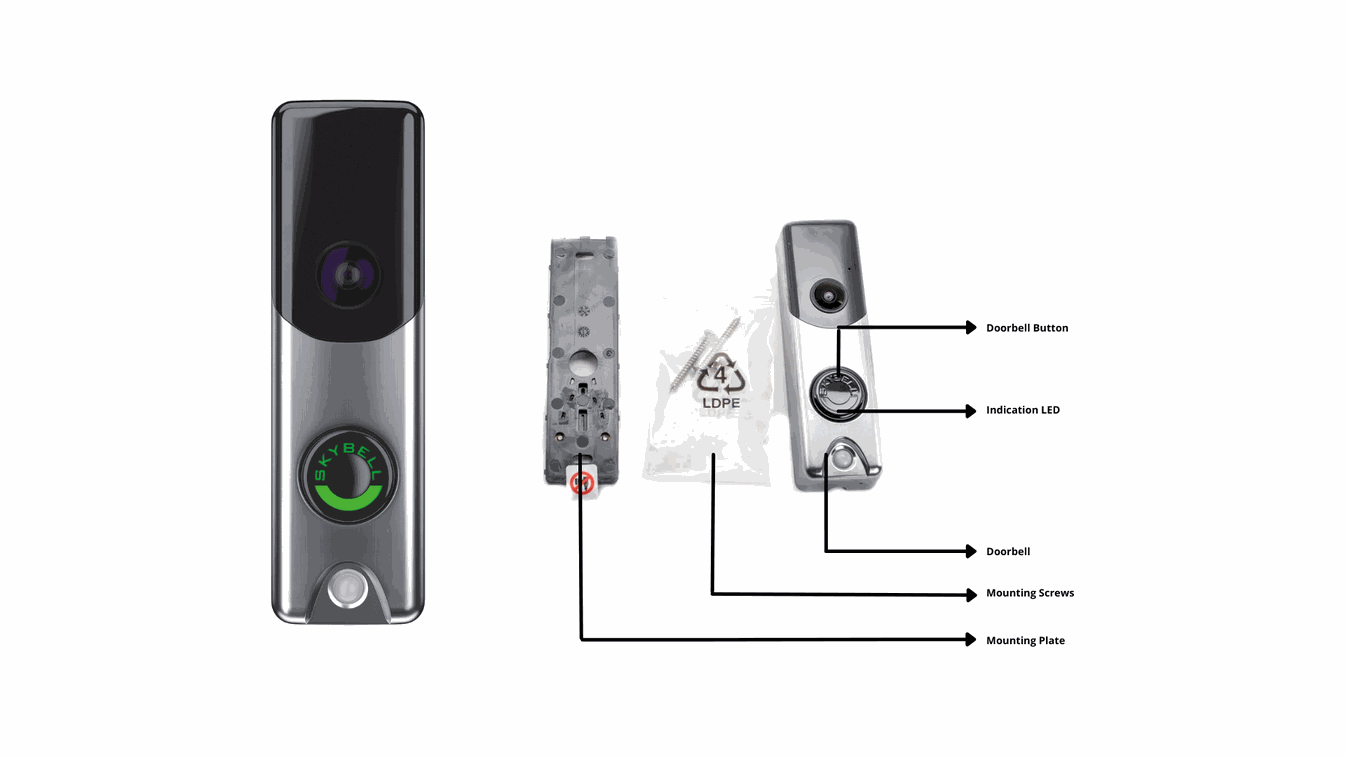
Each Alarm.comDoorbell Camera features a doorbell with an integrated camera, PIR motion sensor, digital microphone and speaker, enabling homeowners to answer the door and speak to visitors via two-way audio –all right from their app.
REQUIREMENT
Alarm.com Doorbell
Mounting Plate (in box)
Mounting Screws (in box)
2x Pre-run cables (1.5 or 2.5 mm2) from chime
Wi-Fi with internet upload speed of at least 2Mbps
4.8mm Phillips Screwdriver
Drilling Machine
Smartphone (Android or iOS)
INSTALLATION GUIDE
There are two stages of installation. The first is installing the mounting plate and the second is mounting the doorbell.
Ideally, the doorbell should be installed towards the door knob, at about 1.3m from ground level, and at least 0.3m away from the door frame. Unless under special scenarios, this is the recommended mounting position.
Before you begin installation, confirm the following.
Ensure that two cables have been run from the chime to the doorbell installation point, with about 10cm of cable coming out of the wall.
Ensure that, when tested with a multimeter, these cables have between 8 - 30 VAC across them.
INSTALLING THE MOUNTING PLATE
Step 1
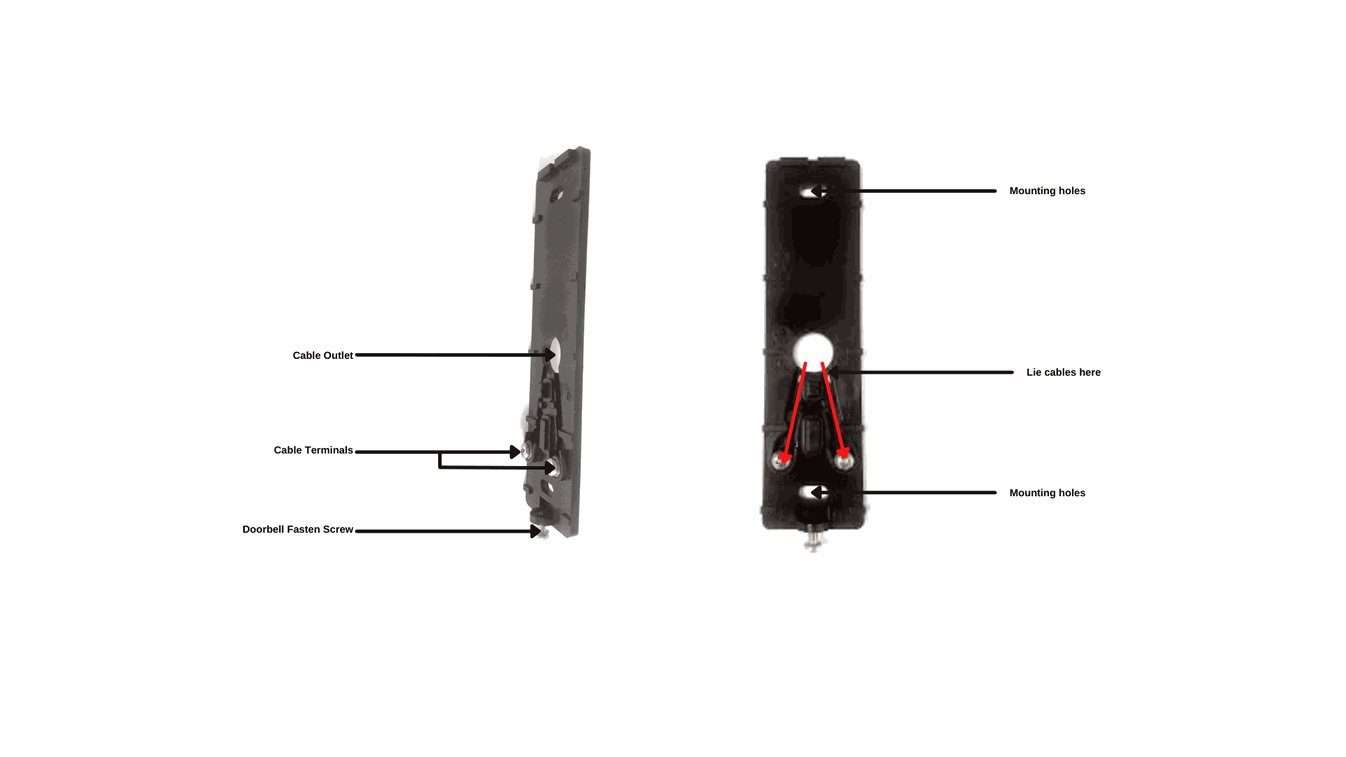
Place the Mounting Plate on the wall. The Cable Outlet should be placed so the cables can easily pass through it.
Mark the top and bottom mounting holes.
Step 2
Drill the marked points. Depending on the wall type, you may need to put fishers into the wall.
Step 3
Pass the cables neatly through the Cable Outlet. Then, with the screwdriver, screw the Mounting Screws firmly into the top and bottom Mounting holes.
Step 4
Lie each of the cables on their cable path to their terminals. Polarity does not matter.
Step 5
If needed, trim the cables. Then, wrap the wires around the terminal screws and tighten securely.
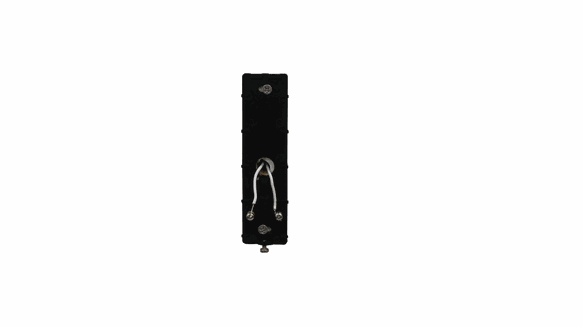
Your finished installation should look like this.
MOUNTING THE DOORBELL
Step 1
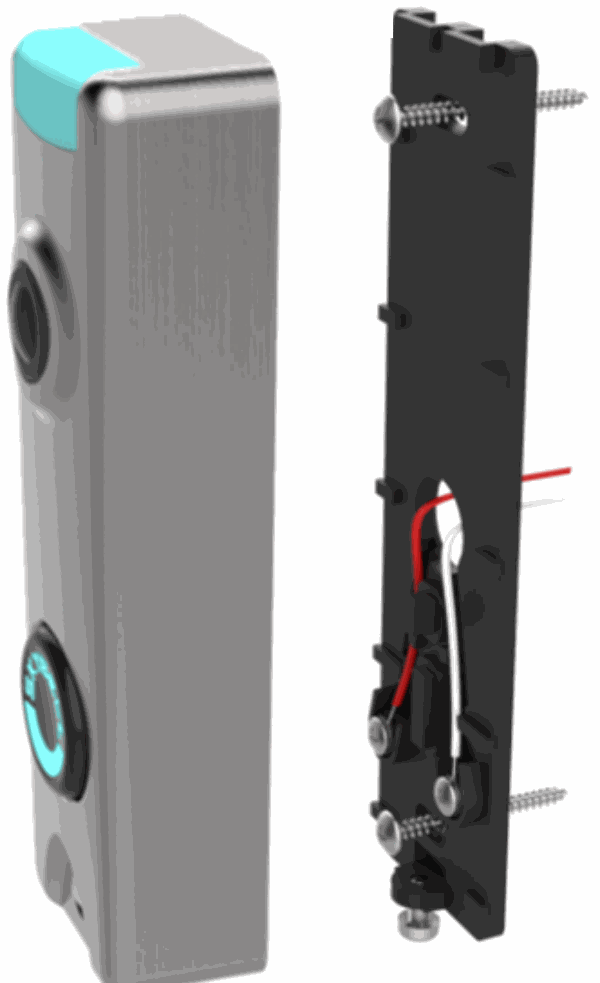
Tilt the top of the ADC Doorbell slightly towards the mounted frame, and slide it into the teeth at the top of the Mounting Plate.
Step 2
Once firm, rest the bottom of the doorbell. With the screwdriver, fasten the doorbell to the Mounting Plate with the screw at the bottom.
The LED Indicator should show solid blue light. This indicates the device is powering up.
ADDING ADC DOORBELL TO ALARM.COM
Alarm.com is the platform by which you can interact with, configure and use your ADC Doorbell. Before you begin, confirm the following.
Ensure that you have a wireless network, with internet upload speed of at least 2Mbps.
Ensure you have downloaded the Alarm.com app on your smartphone.
Ensure that the Doorbell package has been added to our account. To confirm this, you will need to speak to HC24 Customer Service. Kindly check the last page of this documentation for contact information.
Step 1
Sign in to your Alarm.com account on your smartphone.
Step 2
Tap the Menu (≡) icon on the top left of the screen.
Step 3
From the menu options, select Doorbell Camera.
Step 4
Select “Add Doorbell Camera”.
Step 5
Select the model of the doorbell you are using.
Step 6
Tap “Next”.
Step 7
Confirm that the LED is flashing Green and Red. Tap “Next” when this is confirmed.
Step 8
Name your doorbell. Then tap “Next”.
Step 9
The ADC Doorbell has created a temporary WiFi network
| Views | |
|---|---|
| 820 | Total Views |
| 0 | Members Views |
| 820 | Public Views |
| Actions | |
|---|---|
| 0 | Likes |
| 0 | Dislikes |
| 0 | Comments |

To install this Web App in your iPhone/iPad press ![]() and then Add to Home Screen.
and then Add to Home Screen.
